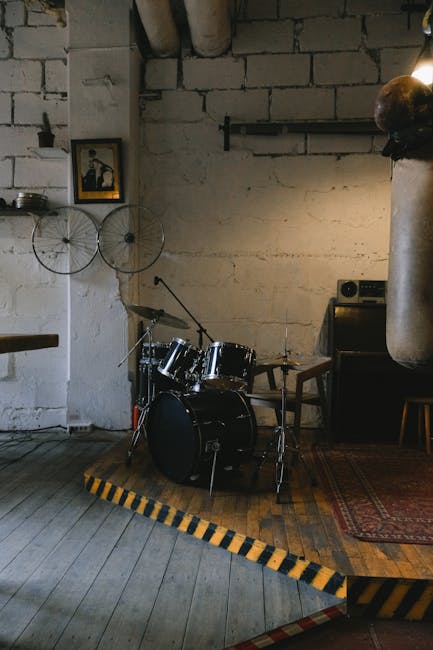
(bright music) – What's going on? My name is Stephen Taylor and I'm going to talk
to you about a groove that I get asked about
every time I play it. And I just call it
an up-beat shuffle and you can find an example
of this, actually, in the… I believe it was
released in 1985. It's the Tears for Fears song Everybody Wants
to Rule the World. And it's just a real cool
way to interpret a shuffle. So, what we're
going to be doing is leaving some of
the triplets out. So, normally we have… (drumsticks clicking – triplets) Well, I'm gonna begin
on the second triplet and I'm going to play
every other triplet.
So, on beat one
we wind up playing the second beat of the triplet. On beat two we wind
up playing the first and the third hit of the triplet and then we repeat that. So it goes… (demonstrates drum pattern) Once we get that
high-hat pattern down I want to do two things. I want to add the kick drum
on all four quarter notes and I want to add the
snare on two and four and you'll have the basic
gist of what that groove is. (demonstrates drum pattern) Now some of you may stop there but if we want to take
it a step further, the second step
for this would be let's add a shuffled kick drum. So, it'd go… (demonstrates) And on top of that,
we're going to play the same high-hat pattern and the same snare drum pattern. (demonstrates drum pattern) And now if you really want
to take it to the next level, the third thing you can do is you can fill in all
of the other triplets with your left
hand ghosted notes.
Now, the trick here
is I'm filling in all of the other
triplets but I still want to hit that
backbeat on two and four. So that may take some
working for some of you to get that what I
call a jab-punch-jab. That ghost note
into an accent note back into a ghosted note. (demonstrates drum pattern) That's just a fun
variation on a shuffle. We call it the up-beat shuffle and you can add it
to your arsenal. I get asked about it
every time I play it and it's really fun to work
on in your practice time. Again, I'm Stephen Taylor. I'm a satellite teacher
here for drumeo.com as well as I run my own
website teaching lessons on my own YouTube channel.
But you can check out
all those links below. (upbeat tempo music).
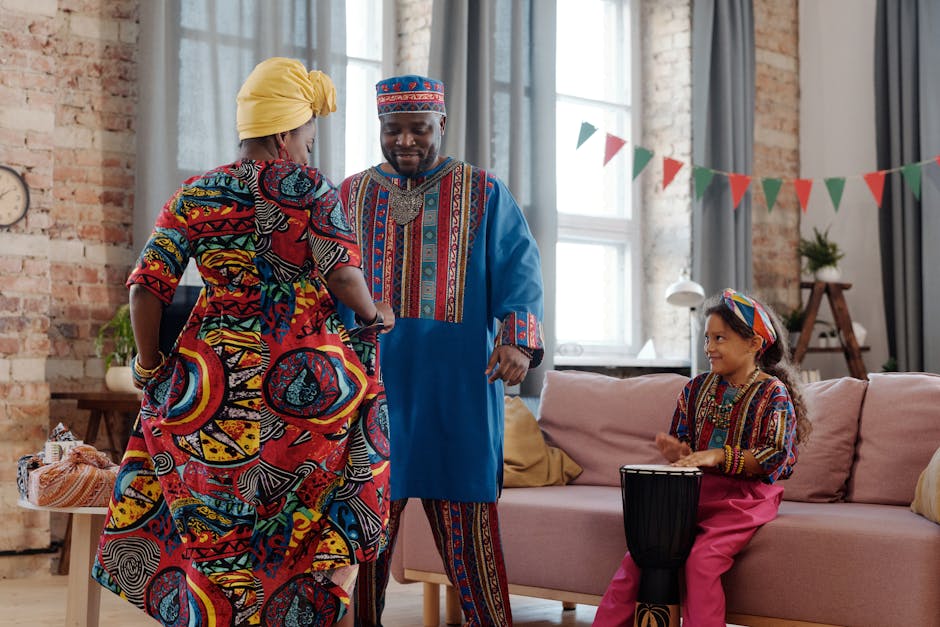
Hi this is Frank with the AZ Rhythm Connection. And this video is going to give you a little bit of play along interactive with a west African djembe drum. Okay? So, if you've got a couple of these with your hands, you can play and have some fun with the djembe drum. So I'm going to teach you one of the most basic things about the djembe drum. Which are the sounds. A bass, A tone, and a slap. And they work with either hand. And with those three sounds from the djembe drum, you can do lots of different things. So in our short time together today I'm going to teach you a very simple rhythm that you'll be able to do with me. And play along and interact. And have some fun. Now you may not have a djembe drum in front of you, use any type of surface.
It could be a table. It could be a bowl. If you did our previous lesson on using your the basics of hand drumming. As long as your hands are hitting any surface, it's going to work. So again let's
get into the djembe drum. A base. A tone. And a slap. Here's a little bit
of what a djembe drum sounds like. (playing Djembe drum) Okay, so those are the sounds. And now let's see what we can do. We do a basic thing which is, "If you say it, you can play it".
Again repeat after me. "If you say it," You: "If you say it, "You can play it." You: "You can play it." One more time. "If you say it," You: "If you say it." "You can play it." You: "You can play it." Great! Okay, so let's go over the basic notes of the djembe. Which are the bass, tone, and the slap. And if you'll notice this drum is tilted forward, because the djembe is a hollow drum.
So if you're using a box on your lap or whatever. Just know that the gdjembe drum you have to tilt it for the sound to come out of the bottom. Okay, so the hand you sign your name with. Which one? That's right. The hand you sign your name with, I'm going to give you a very technical term. And the word is BOOM. B-o-o-m. I'll say it then you say it. Boom. You: Boom Boom You: Boom That's what I'm going to call the bass
note in this session. Boom. Okay so when I say it, you played along with me on the drum. And you'll notice I'm going to take my drum, my hand, and hit it right down in the middle.
Boom! *hit* Good! Boom! *hit* Let's do it with me. Boom! *hit* Boom! *hit* Boom! *hit* And amazingly, this works for
the other hand in the same way. Boom! *hit* Boom! *hit* Boom! *hit* Now djembe drums are loud. You don't have to hit them hard. Some have a calf skin surface. Some have most are goat skin.
But you might be again, playing on your table. Hitting a pot or a pan. Or a bucket. Whatever it is, just kind of hit it in the middle. Boom *hit* / Boom *hit* / Boom *hit* Now I'm going to keep going alternating or switching my hands with booms. Play along with me for a little bit. (play along) Good job! Keep going! Keep going! Keep going! Yeah! Boom *hit*.
Always like to say that if your Boom Boom hurts after this you're drumming right. All right, And give yourselves a Boom drum roll. Good. Now take your hands and do like this.. Okay. And bring them up to your
right eye. And repeat after me. This has nothing to do with drumming. But keep your hands like this and bring
them down on the drum like that. Near you. Or on the table near you. Okay? And we're going to learn the second note of the djembe, which is D. Like the letter D. And I'll say it. Then
we'll all play it. Alternating our hands. D D D (play) DDD (play) DDD. (play) Good! Now you DDD. (play) DDD (play) Let's see if we remember our booms. (play booms) Back to d's. (play Ds) Now we're going to do this sound called a slap. And I'm going to call it "TAH". Like, T-A-H. I'll say it then you say it. Tah.. You: TAH TAH. You: TAH One last time. TAH You: TAH And the way that you play a tah, you just kind of open your fingers up a
little bit.
Not spread wide like a duck treading water. Just a little bit and
you kind of slap the drum just a bit. (plays Tah Tah Tah) Tah Tah Tah (plays Tah Tah Tah) And always remember, don't hit too hard. Okay?
Hit as hard as it is comfortable for you. Being mindful of the surface, if you're playing on a table or some type of animal skin. Like you might have a Native American drum. That you're using to make the sounds. Or cardboard box. Whatever it is there's three basic sounds a Boom, a D, and a Tah. A bass, a tone, and a slap. Let's do them together. Boom Boom Boom (play Boom Boom Boom.) Boom Boom Boom (play Boom Boom Boom) DDD (play DDD) DDD (play DDD) Tah Tah Tah (play Tah Tah Tah) Tah Tah Tah (play Tah Tah Tah) Good make noise with all of them put it together and have some fun with it all
of those sounds put together.
(plays Djembe) Yeah! That's the fun of drumming. Is just being able to hit stuff really loud really soft and having fun with it. Now what I want to do is teach you a rhythm. And remember if you can say it, you can play it. Now the rhythm that I want you to say hear the words. And these are like little rhythmical training wheels. Okay? So for every syllable we're gonna hit the drum on something. Okay? So here's the phrase I want you to say. "I can play the rhythm." I'll say it again, then you say it. "I can play the rhythm." You: "I can play the rhythm." The notes we're going to do are Bass/ Bass/ Tone/ Tone/ Tone Tone Bass/ Bass/ Tone/ Tone/ Tone
Tone. Or.. Boom/ Boom/ D/ D/ DD. Just saying that phrase, "I can play the rhythm.", helps us to know what speed, what cadence to play at. Let's do it together.
One, Two. And it doesn't matter if you hit booms when they should be Ds. Don't worry about it. Play the cadence first. Okay? And we can always work on the handing later. And the sounds later. One. Two. Here we go. And, "I can play the rhythm." "I can play the rhythm." "I can play the rhythm." "I can play the rhythm." "I can play the rhythm." "I can play the rhythm." "You can play the rhythm." Keep going. "I can play the rhythm." Bass/ Bass/ Tone/ Tone/ Tone Tone (play Bass/ Bass/ Tone/ Tone/ Tone Tone) (repeat) Yes.
(repeat) Yes. Keep going. Yes! Great job! This is a very common West African Djembe rhythm. Keep playing. Yes! This video is just to give you a little intro into this culture and music. Good job! Good! A little faster here. We go. A little faster. (play faster) (play faster) You got it! Now when it goes too fast, I just want you to get the bass notes in there. I can. I can. I can. I can. I can. I can. I can. I can. I can. I can. I can. So you can go as fast or slow as you want.
"I can play the rhythm." "I can play the rhythm." Excellent job! (continue to plays "I can play the rhythm.") Excellent! Now what I want you to do, is think about this. Your Djembe drum is always with you. Let me show you what I mean. That particular pattern again, Bass/ Bass/ Tone/ Tone/ Tone Tone. Okay? Here's a way that you can transfer it to your body if you're ever just sitting down. And you're like, I think I want to play some Djembe. Here's one of the things I do.
I'll hit my thighs right here, for my bass note. And then for my tone, I do this. And I just tap the sides of my knee. And then for my slap, I open up my fingers and just kind of grab the tips of them just a little bit so it's like, "I can play the rhythm." "I can play the rhythm." Or Bass/ Bass/ Tone/ Tone/ Tone Tone.
Bass/ Tone/ Tone/ Tone Tone. Now you might be asking what about that slap? Let's put that into now, Bass/ Tone/ Slap. Again. Bass/ Tone/ Slap. And you can do this same thing with your other hand here. I go Bass/ Tone/ Slap. So when we
think about the Djembe drum, It's always with you. If you're sitting down, Bass/ Tone/ Slap. And that transfers to the drum. (plays Bass/Tone/ Slap.) So the purpose of this video is to give you some fun with the Djembe drum. What are the basic sounds and what's a common rhythm that I can play and have fun with it? "I can play the rhythm." Now let's
do one more thing together. Okay? You're going to hear me clap because a thing came in and I'll pick it up
from let's do one more thing together the video is still rolling. Okay I'm going
to tap it one more time, then I'll say let's give me time check two please.
All right, Thank you. So I'll clap
one more time. Then I'm going to say we're going to do one more thing together. Three, Two, One. One more thing we can do together
as well. Now we put the Djembe on our lap. If we were sitting down, but another way that your Djembe is always with you. It's in your hands. So here's what I want you to do. Curve your hands like this and repeat after me, "My Djembe" You: "My Djembe." Repeat after me again, "My Djembe." You: "My Djembe." "Is always with me." You: "Is always with me." "is always with me. Great! So let's curve our hands like this, and we're gonna do like that. Boom Boom Boom *clap three times* Boom Boom Boom. *clap three times* That's where the bass is. Now take your other hand like, this hand you sign your name with here. DDD DDD *clap three times* DDD *clap three times* TAH TAH TAH *clap three times* Boom Boom Boom *clap three times* DDD *clap three times* TAH TAH TAH *clap three times* So you can have fun with the sounds of the Djembe.
Boom, Ds, and TAHs. Wherever you are because that drum is with you always. *plays Djembe* Let's play a little bit along together as we
end. "I can play the rhythm." "I can play the rhythm." *Plays "I can play the rhythm."* Good! Keep practicing. Keep
enjoying West African music. Yes!.
So this rhythm we’re going to look is called
the Kpanlogo. Without the slaps… this is like the basic
version of the rhythm… and if we put the slaps in, it goes… …Solo is a bit different, the solo goes
like this… – Learn how to play djembe and other African
drumming with African Drumming Online.
hi my name is Steven Sacky
guys you guys gotta look into this its called Djambla
it calls drums for the rhythm that you want in it and it's lovely and let me tell you something
about it it takes you three to four minutes to get used to it when you used to it its the
next baby that you gonna ever have please check the Djambla and we'll see you out there while
you're in the lineup for it.. one love peace.
It is a language. While you're making
music you're also hearing other people's music and you find that you're communicating, that you're creating a harmony together. Today's class was such
a gift. These are some of my mentors and teachers and it's just so neat to be
able to bring them into my community. We've been doing assemblies and we'll do
workshops all week long. We are going to be in five different elementaries in
Ogden, we'll go to Weber State University and work with the university students and then we will be going to Weber County Libraries and that one's open to
the public as well as seniors We have classes every week We have a mixed level
drum class on Mondays from 4:00 to 5:00.
I also host other drum workshops and
drum circles through the year It's so nice to find ways that we can come together, we can leave our cares at the door. It's a neat thing to bring to the
community..
Hi there, I'm Clément, from armanesy.com Welcome back in the CHALLENGE #2
series "How to produce a song" Composing Arranging Recording Post-production How I produced my song, the whole process In today's episode, we'll talk about the arrangements Last time we were talking about composition Which is the first step when producing a song If you missed this, click on the "i" showing on top of the screen And see you in a few minutes The arrangements "Arrangement" is a word that has plenty of different meanings But in music, it's the step where you choose the instruments That you will be hearing in the song And how these instruments will coexist So that it serves the emotion of
the song Let's consider again the song "Joy of Life" (link in the description) Huh, what kind of instruments can we add to this song? Electric guitar? Some ukulele? Djembe? Or drums? A shaker? Claps? Bass guitar Well…
Are we really gonna put all of them together? I hope I can make you realize why arranging is so important Everything is about subtle dosing The fine balance Imagine that you are at home Thinking about cooking some food You're probably wondering – What can I cook? Imagine that the meal you'll cook represents our song Then imagine that the ingredients represent the instruments we can add to the song And finally, imagine that the quantity of each one represents the quantity of each instrument we'll be adding to the song Well you might know that when cooking There are proper quantities to respect For salt or oil for example If you don't, eat the meal at your own risks ! In music, it's exactly the same If there are too many
instruments, the song will be a mess Let's arrange everything Arranging is simply choosing what to add, and what not to add.
It's a compromise, which depends on your tastes You will be right if you say that in that case There are thousands of way to arrange a song That's right This is a very personal process, your tastes are decisive If you wonder what choices I did in the song "Joy of Life" I won't reveal it to you right now, so that you can discover it by clicking the link in the description below Make your opinion about the arrangements And the instruments that are involved in the song Panned left and right in your earphones Try to pay attention to those little instruments I'd be glad to know your opinion in the comments section ! Now YOU play ! I have a game for you friends From now on, you are the arrangers of the song You just listened to my version Now I can't wait to know what choices would you have done? Which instruments? Djembe, ukulele, …
What are your tastes and ideas about this song? I'd be glad to know which meal you would have cooked If you were the arrangers Write it in the comments ! And next week, I'll choose the one that I prefer And I will re-record the song, with YOUR arrangements ! That way you will hear how a single song can have many different atmospheres When the arrangements are different Okay, now let's talk about the second fundamental step in arranging The structure of the song The structure of a song plays a very important role in how you perceive the song because it will give it some air and energy Let's explore two notions that I like considering when deciding a song's structure The first one is what I call "alternations" No political alternation here, But the way I organize calm and
punchy sections in the song In the song "Joy of Life", you'll hear many examples of calm sections like this one and other punchier sections, like the choruses like this Thanks to alternations, the mood changes And it helps keeping the listener interested in the song It just gives the impression that it's moving forward and the song becomes more exciting Breaks make the song As well as alternations, the breaks can also help to keep the listerner interested Sometimes in a song, it's good to decide that at a given instant some instruments have to stop playing Such as when you speak, you need sometimes to take a deep breathe Break …
It simply give some air to the song ! Here it is friends, thank you for watching this video If you liked it, don't forget to give me some support for my musical project "Armanesy" It takes lots of time and energy from me to create this content for you You can simply go visit armanesy.com and discover my originals, my covers in video As well as my travel diaries Last time it was about Spain, really cool country I'm on Facebook as well if you're more familiar with it Don't hesitate to like my page, and leave some thumbs up Subscribe to this Youtube channel if you want more videos like this ! I think you got it Oh yeah, and if you have some ideas about the arrangements, don't forget to leave a comment below And next week you may hear your version recorded ! And I'll see you in the next video ! Next Sunday Recording in the studio Subscribe ! Don't need to choose, they're all great
So let’s look at 12/8 time. Hopefully you had a look at the earlier video
about 4/4 time, and in the 4/4 time, I explained that all it refers to is how we divide the
bar up. So, I’ve got a bar with 4 beats in it – 1,
2, 3, 4 – how do we divide those 4 beats up? In 4/4 time, I was saying we divide each of
the up into multiples of 2. So we’re either doing 8 – 1 and 2 and
3 and 4 and – or 16 – 1 e and a 2 e and a 3 e and a 4 e and a. In 12/8, you might’ve already worked this
out, it means we’ve got 12 eighth note hits.
So, what that means is each beat is broken
up, if we’re going to divide it by 4, means we’ve got 4 groups of 3. So we’ve got 1 and a 2 and a 3 and a 4 and
a. That’s 12 hits, 1 2 3 4 5 6 7 8 9 10 11
12. So we’re still feeling a 4 beat pulse – 1
and a 2 and a 3 and a 4 and a – and that’s 12/8. That’s all it means. So, again, to contrast it with 4/4 – 4/4,
we’re dividing it up into 8 or 16, like this: 1 and 2 and 3 and 4 and… Now, to move to 12/8, goes like this: 1 and
a 2 and a 3 and a 4 and a… Notice my right hand hasn’t changed, so
the pulse is still the same, it’s just how we divide it that’s different. So this is 12/8… and now to go to 4/4… So hopefully that makes sense in the difference
between 4/4 and 12/8, and you can hear sort of a qualitative difference between them.
So one’s going… and the other one’s
going… First one’s 4/4, second one’s 12/8. – Learn how to play djembe and other African
drumming with African Drumming Online.
(drum music) – You know, there's a race
to outdo the guy next to you. And this guy can do this, oh, I have to do that plus,
plus something else. And that's a very
unmusical way to go about doing anything behind
any instrument. Make things simple,
try to take words out. My thing's based on
subtraction and simplicity. I think I'm done, I
think I'm done here. – No, you've said
that three times now. We have lots of time left.
(jazz music) (host applauds) – Yes! Seriously, I love my job! – Thank you, good night! – Ladies and
gentlemen, Tommy Igoe. I can't believe
you're on Drumeo. Man, for years.
– For a long time. – For a long time,
we tried to do this. For years, I've been
studying your stuff. Me and Dave always talk about, about this inside of Drumeo,
with all our lessons. – Well, that's all I have
to show you, that's it. That was everything in
one tune that I know. You're welcome. – And I can't believe
you're here on Drumeo. I seriously love my job. So thank you so
much for coming on. – Thank you for
having me, thanks. – So if you don't
know who Tommy is, you probably have studied in
his books, even unknowingly. He's the author of Groove
Essentials one and two, and Great Hands for a Lifetime. Both are excellent and
best-selling products. And also, we here at
Drumeo are going after you, and trying to, trying get
the best selling product (laughs) – You're coming for
me, good luck baby.
– I know, right?
– You won't believe what's coming out next year. I've got a better idea,
let's do something together. – Yeah, yeah, we'll
figure that out. So he's a huge personality. And all I know about
this lesson is the title. Because he's just missed,
he just likes to go for it. So what songs are
you playing, Tommy? I don't know, what do
you want me to play? So he played on the
Broadway Lion King, Birdland Big Band in New York. You have Tommy Igoe's
Groove Conspiracy. – That's in San Francisco.
– In San Francisco. And so you've got, you're
always doing something. And as well as
teaching privately.
– Yeah, yeah. I have like four bands that are
running currently, you know. I just did a tour with the
United States, the South, the East Coast and
Midwest with a band called the Berlin All
Stars, which is half a band from the West Coast, half
a band from the East Coast, with a live, with a live painter
onstage with us painting. You know, so we would,
so this is how I roll. I never get, I
don't plan anything. I think the best
stuff comes from fear, danger, and improvisation.
So the band doesn't know
what we're gonna play before we go on, and, you know, if I call a set list, it's
90 seconds before the show. So the painter had no
idea what we were doing. So he would paint new
stuff every night. – That's great.
– You know. And then we'd, you
know, auction it off at the end of the
show and stuff. So it was really cool.
– That's super cool. I want to take a moment to thank the sponsors for this lesson. Big shout out to Yamaha,
all the people there, Shawn, Ryan, Kim, Omar,
and everyone with Yamaha has always been so
supportive of us. Zildjian, Vic Firth, Remo, definitely check
out those companies, they make some great products. You also should check
out Tommy online. He's, it's pretty
much @TommyIgoe for Facebook,
Instagram and Twitter. – You see the great thing
about having an unusual name, just look Tommy Igoe,
and there it is.
– You'll see it all. – Yeah, it isn't like, you know, somebody with like
a really, you know, Steve Johnson, or somebody
like you know, like– – Mike Davis.
– Yes, exactly, Mike Davis. There's a lot of Mike Davises. Steve Smith, there's
a lot of Steve Smiths. – If you like Drumeo, we'd
love for you to check it out. Go to drumeo.com/trial, you
can get a free seven day trial. We are streaming
live all the time, and doing all kinds of cool
things inside of Drumeo. With that said,
let's get into this. We've got Great Hands
for Groove Essentials. This is like the perfect title. – Well, we were
thinking about it, 'cause you know, we're
gonna do the thing tomorrow, and you know, so,
those two titles are kind of the titans of
their respective genres. So, how about we do, you know, 'cause one is not, they
relate to each other. And Great Hands is built
on a foundational technique that's rooted in relaxation
and musicianship.
And Groove Essentials,
at some point in every drummer's development,
you're gonna butt up against a technique
problem, almost always. You know, it's either gonna
be something over speed or musicality, dynamics,
you know, phrasing. So why not combine it together, because they are
completely related. – Yeah, and you have a, you
have a drum line background. – I do, I do. – You studied the
technical side, and then you also are a very,
very active player as well.
– Yeah, well, I mean my thing
is I am a player who teaches. I'm not a teacher
who also plays. I've made my whole foundation in playing and performing music. And that's, you
know, that's probably one of the biggest disclaimers
to probably put out. So technique, the
only reason I do single surface practice on a pad is to serve this instrument. Like I don't do anything
to just, you know, work on chops for chops' sake. Everything is built around
moving to the drum set. And phrasing on the drum set. And using your
technique as a way of expression on the instrument. You know. Now, a lot of people say that. But then they,
there's like a lot of, you know, this kind
of like beasty, you know, gladiator-esque,
who's got the fastest, the fastest gun in the West. You know. And that comes, you know,
we're getting to the point on our instrument where the
limits of human endurance, we're starting to
butt up against that.
It's like, when you look at like Rafael Nadal playing tennis, he hits the ball so violently. You might be able to get maybe
another half mile per hour out of it from some other
guy or something like that, but you know, we're
getting to the point now where guys are just, you know,
there's only one thing left and that's to set
the drums on fire. – They're doing that.
– Right, exactly.
You know, so technique has got
to be sort of a musical goal. And usually that has to do with what kind of music
you want to play. So guys who are playing
blast speed metal are going to have a
different set of goals than guys who are
gonna be playing jazz or funk or R and B. – So how do you balance this? And how do you know what
to do, and when to do it? Well you know, the
first thing you have to be able to do is play at all. And the thing I see a lot, especially with the
onslaught of social media coming at everyone
is that there is this kind of race
to outdo everybody. You know, there's a race to
outdo the guy next to you. And this guy can do this,
oh, I have to do that, plus, plus something else.
And that's a very
unmusical way to go about doing anything behind
any instrument. Now that's going on everywhere, but the drums, as
usual, are magnified. You know, we play
a very physical, violent almost
instrument sometimes, and it's very easy to get into
that gladiator-esque mindset. And, you know, for
me, that doesn't do anything for me musically. And music is why I'm here. So I only play with
other musicians. That track you just
heard, every single note was played by a real musician. That was just off
my last record, just took the drums
off, and I tried to not ruin it when I'm playing. But it was all, so
like the time moved.
It wasn't like a click. And it was very organic,
and that's what I am. And I know what I am. And like, so you're not
gonna see me giving lessons on playing double bass
drum, speed, blast beats on a death metal band,
that's not what I do. So you know, I know who I
am, I know what I offer.
And the fundamentals of
great technique I believe are the same for
just about everybody. Now where you want to
take those fundamentals, that's where we, our
paths start to change. But the fundamentals really,
having a healthy start to the instrument
I think is actually the key to being able
to play the instrument for decades healthy,
without injury. – So what are the fundamentals
of good technique. Well, if you, so I'm
assuming a few people have probably seen Great
Hands for a Lifetime. So Great Hands for a
Lifetime starts out, I don't teach Moeller,
or any of that, I'm not a proponent of
any name brand method. And I just gotta tell a
funny story about Moeller.
Now, Sanford Gus
Moeller, you know. So the Moeller technique
was always around, always. And when I was a kid coming up, I took lessons with my dad,
and a bunch of other guys, Dennis DeLucia was
my mentor and stuff. So all these guys in drum
corps, they were all, you know, you'd hear
the name Moeller, it would be like a thing. Oh the Moeller
technique, oh yeah, oh yeah, the Moeller technique. Right, right, you know, lift
and the whip and the thing. And now it's become a fetish amongst drummers who are like, who make it like a way of life. Do you do Moeller? Moeller. – I'm gonna put
that on Instagram. – It's like it's becoming like, well, I do Moeller technique. It's like, what are
you talking about? What is, what happened,
and I know what happened. The internet happened. And branding happened. And a couple of
famous drummers said, well I discovered this thing. And now I discovered
this thing in the 1970s, when I was five years old. And it's like, you
know, and it's like, oh here's the Moeller
technique, it's based on it.
And boom and that was it. Which is like a thing, it
wasn't like a way of life. You know. So the whole name
brand method thing is something I do not use. I use the whole whip
thing, you know, the whip and rebound
and all that good stuff. But there's only three
strokes in my universe. That's it. So I should probably
let everyone know my educational philosophy
is built on simplicity. And if you're trying
to make things simple, you actually take the
handcuffs off your students. Make things simple,
try to take words out.
My thing is based on
subtraction and simplicity. So in my universe, there
are only three strokes. Rebound, taps and
accents, that's it. That's all you need. So for rebounds, right,
if you're just looking, you know, without going
into ultra basic stuff, if you're gonna be
playing match grip, you have a fulcrum
here, three, four, five, stick goes down the palm,
you're over the top.
So if you look like
this, it's wrong. If you look like this,
if you look like this, if you look like
this, it's wrong. If you go like this,
nice, right here. Then you're playing right here. So the most, the biggest
mistake I see most people make when they first start
to physically play. If I said, okay, Jared
give me a drum lesson. You would say okay,
fine, you know. And I say show me
how to hold my stick. And you'd say, like
most people do, well you hold it here,
and you have a fulcrum.
And I'd say what is a fulcrum? All right, now at that point,
I lose 50% of my audience. And they say, a fulcrum is,
you know, it's a fulcrum thing. All right, well it's
an English word, it's a balance point on a lever. So a seesaw is probably the
easiest example of a fulcrum. You know, a teeter-totter. So here's your fulcrum. They say, I have a fulcrum
right here, and then I. (drum music) And then they use their
wrist and they go like this. Well, when you do that,
your wrist is the fulcrum, and you're not using
a fulcrum here.
Okay? So if you have to let this go,
and let the stick get away, the back of the stick has
to move away from the hand. Okay, and then that means
you have a fulcrum here. Okay, now your entire
body is made of fulcrums. Fulcrum, fulcrum,
fulcrum, fulcrum, fulcrum, fulcrum,
fulcrum, fulcrum. Every single one of your digits on your fingers is a fulcrum. You could go crazy
talking about that, but we don't need to do that. The point is that you
want to let things bounce inside this fulcrum here. So we're gonna use a
first class fulcrum, which is a seesaw,
which means you have positive and negative on
either side of the fulcrum. Positive and negative. As opposed to a second class
fulcrum, which is this. That's a door, a door opening
and closing on its hinge. That is a second class fulcrum. The door closes, the door opens. There's no negative, it's
only positive from the hinge. That's what we don't want. So if you're playing like this, and you're just doing rebound
strokes, eight on a hand.
Two, three, four. One, two, three, four. One, two, three, four. One, two, three, four. One, two, three, four. Just that, so that
exercise is literally the very first thing
I teach everybody. I don't do anything
like half up, down or anything like that,
all we do is bounce. Like bouncing a ball,
that's all that we do. (drum music) and we're looking for symmetry using match grip on both sides.
If you go into 12 o'clock,
it goes right here. You're on either side
of your 12 o'clock. (drum music) And you want the sticks
to sound the same. So here's something
that's not good. (drum music) So the left is completely
different than the right. Which is a totally normal thing, 'cause we all,
almost all of us have a dominant side, whether
it's left or right. So you're gonna work on the
side that's not dominant to get it as fluid and as
natural as the other side. (cymbal clanging) So after we do these
beginning exercises, the next thing we learn
is an accent exercise. And that's where the
Moeller group comes. Moeller, (makes
shushing sound) Moeller. All right, and you go, (hums) okay, we're not
gonna do that though.
All right, just
whip, just do a whip. Everybody knows what
a whip is, whip. Okay, boom. All right, now when
you play the whip, you leave the tip
down, you're set up for an unaccented note,
which is called a tap. Okay, that's all
you need to know. And a tap. So the first exercise is. (cymbals clang) Now, all these beautiful
natural things happen without even telling
the students. They start prepping for
their whip on their own. (cymbal clangs) Because the next note is loud.
So if you leave them alone,
and just say look at me. Look at me and look at you. Look at me look at you. And go back and forth. They start to
naturally start to lift on their own without
making an actual physical device
that you have to do. So again, simplicity
and subtraction. We're trying to get, technique
should be transparent. We're trying to
get our technique to be as transparent as we can. So anything you say,
on this instrument, you don't want people
to think wow, technique. Holy technique,
that's some technique.
Drummers think that
way, musicians don't. Drummers think that
way, musicians don't. And you don't want, you
know, that's a problem that we have a lot of times, especially with young
people coming up. And again, with social media,
they have different challenges than we had when
we were coming up. They are getting likes
from other drummers. Other drummers are leaving
very drummer-esque comments, and drummer-esque criticisms. And they're not a lot of
times musical criticisms. They're just more like, you
know, drumming criticisms.
And so drummers are, young
drummers are thinking very drumistically
and not musically. And you want to try to keep
it as rooted in the music. So that simple
exercise right there. So if you went to
the kit and you went, (drum music) It's pretty easy
to see how it goes to a four grouping
R and B thing. The second exercise is this. (cymbal clangs) The classic
push-pull, all right. When you shank, tip,
shank, tip, shank, tip. So we don't need to
overemphasize the
motion in the wrist because the student is
going to naturally see it. (cymbal clangs) So, and Brazilian,
which leads us to, this technique leads
you, if you go through the Groove Essentials, the
last grouping is world music.
And if you're looking
at a Brazilian thing, so I studied with a
Brazilian guy named Porcinio. And this guy, man, he
just kicked my butt, like in terms of like being able to play sambas and
Brazilian stuff. And he just had
this way of playing that was distinctly
not American. And I remember listening to it and being completely
hypnotized by the way. And he would just, you know, it's the same drum
set that I'm playing. But he got a completely
different sound out of it. And it got me so frustrated. I was like how does
he do that, you know. So I bugged him for lessons,
and he took me under his wing, and gave me some
lessons and stuff. And it didn't take very long
to figure out that it was much more mental than it
was anything physical. It's all, it was all mindset. And he plays like
a percussionist.
He plays like, you know,
he can pick up a pandeiro and go (imitates pandeiro), you know, so this
instrument has had all this color and depth. So, and he started, he goes
this kind of thing right here. (cymbal clangs) You notice that you're
doing a push-pull. But the stick is staying
in exactly the same spot. (cymbals clang) So you're not. (cymbals clang) It's a great technique. So in Great Hands we go through dynamic changes
and all that stuff. And you're looking
at stick height. (cymbals clang) So you can see that
it just stays there. (cymbals clang) (drum music) So that sound has gotta
sound shaker-esquey. Or pandeiro-y. (drum music) That sounds great, I know. So the idea of having
transparent technique, which is where we were going with all that stuff
in the beginning, and how does Groove
Essentials start us out, it starts out with simplicity. It starts out with
three strokes. And it starts out with
the idea of technique being transparent
behind the music.
So, there you are. I'm done. – That's it, we're
done for the day. (laughs) So let's go into, before
when you were warming up, you were playing this song,
and the song, you said, this is a song, a great song
for the left hand stuff. – Yeah, it was a shuffle. So that was actually a groove
I wrote for the Lion King. – Oh, really?
– Yeah. So the Lion King was written, some people might have
heard me tell this story. When the Lion King was written, I was kind of brought
on as a last resort. (laughs) Because
they were trying to do it with only percussion. And it didn't work. You know, because it's Elton
John songs with African stuff. It's not African stuff
with Elton John songs. So the backbeat of the
Elton John stuff is first, and then they layer the African
percussion on top of it. So, but with that
said, I couldn't play the drum set like a,
you know, a pop drummer. Every time I'd touch a cymbal,
or did something normal. – Yeah, drumming.
– Yeah, drumming, Drumeo-y, I would, they would stop
and say, hey man, no.
That sounds out of place. So we had all these grooves. And one of them was a shuffle. And it was, you know,
it wasn't really written for the drum set. So I came up with this, I
came up with this thing. And it was based on the drums. It was rideless. And you know, rideless grooves, rideless grooves
are not new, okay, so I want to make
that very clear. The way I'm doing it
on this instrument is a little unique, you
know, for my application. But drumless grooves
have been around forever.
I mean, rideless grooves. I mean the ride cymbal's a
relatively recent invention. You know, all
drummers used to play, that's why drummers used to
have fantastic press rolls. (drum music) They used to have to
play time like that. And then they had a
thing called a lowboy, before they had a high
hat, they had a lowboy. (drum music) And then my tumble blocks
and the whole thing, and the (shrieks) the whistle. – Have you seen that
video online of that guy pulling those chains,
that thing is awesome.
I would love to be
able to play that. Yeah it was like,
you know, those guys, either maybe a drummer
or a piano player for silent movie houses. They would just, you
know, they would have a, this is why it's
called a trap set, because it was a contraption. You know, it was a short
form of contraption. It was a contraption that
had like stuff all around it. First, do you know
what it was called before it was the lowboy? – Lowboy?
– Before the lowboy. It's now called a high hat. Before the high hat, it
was called the lowboy. The thing before that
was called a snowshoe. 'Cause it was two
pieces of metal, two pieces of wood, with
metal things on the inside. And they just used to
stomp on it on the floor. It was called a snowshoe. Snowshoe, lowboy, high hat, that's the evolution
of this device. – There you go.
– I think I'm done. I think I'm done here.
– No. You've said that
three times now.
We have lots of time left. (laughs) I was hoping you'd
play that song with the left hand
stuff, 'cause– – You want to do that?
– Yeah. – All right, sure. Let me show you
the groove first. So, I was playing the kind of
steroid version of it before. But it's a great little groove. And since we were
talking about technique. So the thing that we came
up with to talk about today. You know, so everybody
kind of knows where we're going with this. I hope everybody's having fun. 'Cause I'm having
a hell of a time.
– We have, we have a title. That's all I have.
– Yeah, we have a title. – When you said what
we've come up with today. All we go, this guy could talk
about this stuff for so long. – Yeah, I love
music and the drums. And I'm very
passionate about it. I could do this all day. – You're not passionate at all. – I'm not passionate at all. Well I mean, you know, I wake
up everyday loving what I do. So I'm a lucky, lucky person. And I want, my passion
comes from wanting other people to express
themselves on this instrument. You know, I want people to feel what artistry is like,
personal artistry. Like what it's like, you know. No matter what anyone,
anyone's goal is, it has nothing to
do with playing in
Madison Square Garden, it could be playing at the
pizza parlor down the street. With some friends or
something like that. Or just, you know,
whatever you want.
Just watching people express
themselves on this instrument. And me having any kind
of a positive influence on that really makes me happy. You know, it makes
me very happy. So anyways, so the title
was about how Great Hands meets Groove Essentials, right. So at some point, you're going
to have a technique problem. Everybody does. It could be as simple as this. You know. (drum music) Now, that's very easy
for a lot of people. (drum music) Okay, but some
people can't do that. And they can't go.
(drum music) they can't do that speed. Right, they can't, (drum music) we're gonna start out with, we'll just say one
group of 16th notes. (drum music) So their challenge is
going to be through, I'm not doing a commercial
for Great Hands, you can either get
it or you can't. But I do a thing and that, if
you follow Groove Essentials from the beginning, there's
something I bring in that's called check patterns.
And I didn't invent
those either, I didn't
invent anything. But I share what I've
learned with everyone. So, and I'm a big believer
in people inventing their own check patterns to
solve their own problems. So if you're, say you're a
drummer who can't do that. (drum music) It looks really easy
for some people. But some people lock up. They hear, they feel the
16th notes coming on, and before they even
get a chance to play,
their hands lock. Now that is not
technique, that's mindset. Because I say,
okay, let's do this. Do this with me. (drum music) See? Well, you can do it
with me too if you want. Everybody do this with me. Do this with your right hand. (drum thuds) Ready, go. And everybody can do that. (drum thuds) I've never had a student
yet once who didn't do that.
All right, and 'cause the
reason I'm telling this story is because this just happened. Literally just happened
before I left for the road. This student just was, like
they would be playing along, everything would
be fine, and then, whenever a fill came, the
wheels just came off the bus, and they, you know, were
weeping practically. Well not really, but
they were pretty upset. So I said, okay. And they said, I can't do it,
it's too fast, it's too fast. And the technique, my
hands, it's too fast! And I'm like, all
right, okay, well, you know what, let's take a
look at this, let's make sure. And in my head I'm like,
this is not too fast. But he thinks it's too fast. So I said, just do this with me. (drum thuds) Like this, right? And I said, do it
with your other hand. (drum thuds) Now you do it with that. (drum thuds) And then he stopped. And I didn't say anything. And he's just looking
at the snare drum.
And he went, oh my God. I went, uh-huh. I said, it's not your
chops, it's not your chops. And I said. And I didn't tell him,
but I took a video of him. When he was screwing
up really bad. And by the way, if
you have a phone, look at your phone and
hold your phone up. You probably think
it's a phone, right? It's not a phone. It's the greatest
single musical education device ever created by man.
– Yeah, because you
can get Drumeo on it. – Yeah, because you
can get Drumeo on it. That's really why. And you can actually make
videos of your realtime crappy performances
and analyze them. So the super slo-mo
is great for, I had one student who
could not play a left flam. Not a joke. He could do a right flam. (cymbal clinks) Right flam.
(cymbal clinks) And every time he
did a left flam, he could not get the grace
note down before the primary. – Really?
– He kept doing. (cymbal clinks) I've seen it all. There's not, anyone who
comes to study with me, you will never faze me. I have seen everything,
anything that you can do behind a drum set, and
there's nothing I can't fix.
Nothing. And so I was like,
and this is a very, this kid who was
having this trouble, he was a very visual kid. I think he had a
little ADD or whatever. Maybe a little dyslexia,
I don't even know. But I could tell
he was very visual. But he was obsessing
about himself. In real time, he couldn't
parse the information in his head to understand to get this hand to go down
before the primary. So I did super slo-mo. And I had him play
his right hand flams. And they were beautiful. And he saw the raised stroke, and in the super slow-mo
it was like, whack. And then he saw what
happened with this coming down before this one,
and it clicked in his head. And he never did it again. It was just a matter of
him making the connection. And it was up to
me as the teacher to speak the language
of the student. Not the language of the teacher. It is, the reason I'm
pretty good at this is because I am flexible enough to go inside the
mind of the person I'm trying to have a
positive influence on.
I do not have this, you
know, I don't wear a big T on my shirt when you
come in, and say, this is Tommy's room, and
you're gonna do it Tommy's way. I look at what I
have to work with. And I'll do anything
to solve the problem of the person sitting in
front of me at that moment. And using that super slo-mo was
what he needed at that time. So anyway, the kid
who couldn't do the, (drum music) he couldn't do that, right? So I showed him a
video of himself. And now this is why
I'm telling you guys this out there in Drumeo land. This is a really common
thing that happens, especially when people
are just starting to play, and they want to play
a little bit faster, and getting frisky with
their tempo on the thing, and they're trying to
get a little faster.
And they gotta play a fill. All right? (drum music) I'm already cooked, I'm done. This ship has sailed. Look at my shoulders. I'm done, that's what
this guy was doing. (sighs) In through your nose,
out through your mouth. (sighs) Shoulders centered, sitting
with your chest out, calm. And you do a drill. (drum music) The drill is when
you play the fill, the shoulders stay down and
you exhale through the fill. (drum music) In, out. Now for some people,
that is second nature. Now that's the last
time I ever want to have to say that again. For some people,
that's second nature.
Because that's why some
people can just sit down behind a drum set
and play really fast. Because they have really
fast hands naturally. All right, and you may not. They do, but that does not make
them great musicians at all. So everyone has
their weaknesses, everyone has their
problems to solve. So never look at the
other person and compare. And say, uh-oh,
they can, I can't. You have to take care
of your own house and do your own forensic
analysis, solve those problems. You'll be a much
happier musician. – Yeah, I totally agree. Every student is so unique. – Everybody, every human who's, anytime you express
yourself on an instrument, we are, we can make a line
right now of all the hundreds of people who are watching
this online right now. Everyone who's watching. If we made a line, right
now, behind this drum set. And we had people, every single person come up and play this. (drum music) We would have 100 different
interpretations of that groove. That's just the way it is.
Because everybody
has their own voice. Okay?
– Great, okay. You've gotta show
us that groove now. – All right, so the groove
is a left hand thing. And it's a shuffle thing
with the left hand. (drum music) So that groove, the
feet are really easy. It's just. (drum music) All right, and the
backbeat is over here, on the and of two. It's a syncopated one, two, and. And then the other
backbeats are over here. All right. (drum music) Now that looks, maybe it looks
easy, maybe it looks hard. I'm not sure what it looks like. But that sound. (drum music) So off center.
(drum thuds) And that's a shuffle, right? And so you have to, the
most beautiful thing about that is it has
to be consistent. (drum music) Now, it's in the middle. It's between swung and
it's between straight. So here's a dotted 16th. (drum music) (imitates drum sounds) And heres a triplet. (drum music) And here's an eighth. (drum music) So you have the two
spectrums right there. 16ths, the eighths,
triplets in the center. And then you move your
dial with your left hand. (drum music) and it gets that kind of swampy
New Orleans kind of thing. (drum music) You know what I mean?
– That's cool. So this is like, you
wrote this groove, and then you needed to have
the technique to do it.
And so then, and that's
when you determined what the problem is,
the forensic analysis– – Right, well I
didn't, and again, guys who come up with
stuff on their own, a lot of times don't
realize if it's tricky until some other
drummer has to learn it. So I wrote these grooves. And I didn't realize it was
gonna be such a pain in the ass, until I had drummers,
other drummers come in and learn Lion King. And they couldn't play it. And then we had, we
came up with variations and stuff like that,
and it was fine. And all the guys just
worked on their left hand, they took it as a challenge,
and then worked it up. But I didn't realize,
I was like, oh wow, like wow, that is kind of fast. But I didn't realize
it until it was actually happening at that time. But yeah, that groove came right out of the
Lion King experience. – So can you play that song? – Sure, it's the 87th groove. (laughs) The 87th groove in
Groove Essentials.
– How many grooves are there
in Groove Essentials again? – In the entire Groove
Essentials universe, between books one and books two, so Groove Essentials One
is groove one through 47. Groove Essentials Two
is 48 through 100. And there's hundreds of
play-alongs and all that stuff. And this is the 87th groove, and this is the first one
of the rideless grooves. And like I said, I didn't
invent rideless grooves, like. (drum music) You know, rideless grooves have
been around for a long time. But this is kind of cool,
because it's a different way to put it in a shuffle
with a backbeat in a pop song with
African stuff. How many times are you gonna
do that at the pizza parlor? I don't know.
(smooth jazz music) – Man, that was great. That was really cool. – It's a good workout for
your left hand, you know? – Very good, yeah. So, the other day,
we were talking, you said, and I think
we talked a little bit about technique now, right, let's talk a little
bit about the grooves. So we talked a little
bit about hands, talk about the grooves. So you said like,
Groove Essentials is like a make pretend book. What exactly did
you mean by that? – Well, in that it's
not a method book. It doesn't start at
page one and say, okay, this is how we're
gonna play jazz today.
And we're going to
split triplets up, and we're gonna do this, and you're gonna
follow this method. There's no method in
Groove Essentials. Groove Essentials is, you know, every page
is a full lesson. And it's written
in, there's a couple breakthrough ideas
in Groove Essentials, and all of them are
basically right on the page. And the fact that
it's a main groove with a couple variations,
a chart, and a song. So the entire thing is built on, and the play-alongs
were designed, and this is very,
very, very important.
Were designed to be
explored by musicians behind the drum set who
wish to be musicians. So there's nothing,
they're all real musicians playing on all the tracks. And it's, they're not quantized. So, like if you
listen to that track, if we just listen to that song, there's a lot of loose
things going on in there. And like so, just for example, let's just do that together. Let's just listen to this
music without me playing along. Okay, and we'll just hear it. (smooth jazz music) (imitates piano music) That is, (imitates drum sounds) and the guitar is,
(imitates guitar sounds) like, I don't even know what
the hell he's doing up there. He's playing. (imitates sounds) You know, and it's,
it's like what is that? You know what that is? That's glorious. For a drummer to come in
and be the unifying force. It takes this soup,
and just goes zap. And you put it
right in the pocket. 'Cause that was
recorded with me. So those guys were there,
so everything was cool.
But when you take
the drums away, you realize like,
they were interpreting where the beat was and stuff. So Groove Essentials
is a make believe book in the sense that you make
believe you are in a band. And it forces you out
of your comfort zone. Because nobody's
good at everything. We might have some guys
who are great at rock. Killing at rock. They can't play a bossanova
to save their life. They can't swing. They have a pretty
good funk beat though. They play a little
funk, a little R and B. They can't swing, they
swing like a rusty gate. – You pretty much
just described me. (laughs) – Well that's what you gotta do. – I'm not joking though.
– Well, you know what,
what I just described is most modern players. You know, we live in
a eighth note world. Everyone who's been born,
if you're listening to this, if you're under the age of 75, you've been raised in
an eighth note world. And what I mean by that is
you've had straight eighth notes shoved at you your entire life. Walking up the aisle
in a supermarket, you're hearing, (hums) you're hearing eighth
notes your entire life. And it's like that
around the whole world. It didn't used to be. You know, some of the world
that didn't have Western influences coming at them
had, like African music, or Indian music,
and stuff like that.
But you know, pop music
has kind of infiltrated everywhere now, no matter where
you go, you're hearing it. And with that
said, that is okay. Because we all, and this
is another big thing of mine educationally,
we all bring to the instrument our
gifts and our baggage. We all have gifts,
we all have baggage. We all have things
that we need to unload to play this instrument better. – What is your baggage then? – My baggage is probably
I have a too fertile mind. My baggage is I'm always
reaching for subtraction. Because even as I'm playing,
I have 52 amazing ideas, and I don't know
which one to pick, and I'm gonna play
them all, baby! (laughs) So that's my baggage. My brain is like,
it's quick, it's fast, and I have to be the
master of my brain.
I have to be in control
of what is going on. And I can't play
everything all the time. I have to just take one,
just take one, just one, those other ideas
will be there later. And when you're younger,
you think, holy crap, I'm gonna forget
this great idea, and it's never gonna come back, and I've gotta
play it right now. – My son, the other
day, he was trying to say something to me,
and I was doing something, and I said, wait, and he
said, well now I forgot it. Well, if you forgot it,
it was never important, right, don't worry about it. – Right.
– Okay. So you've got all these,
you've got all these grooves, you know, 100
grooves or whatever. Where do we, where do we start? And how do we know which ones, should we work on
what we're weak at, or should we work on, should
we make our strengths stronger? – Well, you start with,
I always recommend that everyone be humble.
Now this is a great,
this is a great question. – The first one.
– So, it was a great, listen, ladies and gentlemen,
Jared asked a great question. (audience cheers) – Insert all the laugh tracks. – It has happened. So no, that's a great question. So I'll give you an analogy. I have been into martial arts
for a very, very long time. And I studied for a
really, really long time. And I studied and got to
right underneath black belt. And then I stopped. In this traditional
Okinawan style. And then, I went away for
several years, didn't train. And I came back. And the sensei
offered me, he said, well, you know, we could put
a couple of white stripes on the end of your
belt, and basically, as you remember
what you used to do, and get yourself back in shape, we'll take the white tabs off.
And I said no, I want to
start over again at white. I want to start all the
way at the beginning again. And that was after literally
11 years of training. I started again at
white, at white. And he looked at me and
didn't say anything. He said, that's why I like you. And I think that, so when
somebody gets Groove Essentials, and they get Groove
Essentials One, that's what I've got right here.
But if get Groove Essentials
One, and starts at groove one. And groove one is this. (drum music) Okay? And some, and I've had
some people come in to me, and I've had like
professional drummers who come to me
for, well you know, they book a lesson
six months in advance, they're gonna be coming
through for some tour. I want to take a lesson. And we book three or four hours. And they come in,
and they can play. They can play, like
there's no doubt about it. They're professional
drummers and they can play. You know, they're
playing on a pop gig. It's some guy with a, you know, mega monster pop
person coming in. And this guy can play.
And he wanted to,
like, he wanted to dive into the deep end of the pool and learn my stuff
and everything. And I was just like,
all right, here we go. Groove one. And he was like, what? And he said, man,
I'm way past that. And I said, you just
showed me you're not. I said, you just
showed me you're not. And I said, I said,
I'm not past that. I said, I'm not, I am never
past groove one, ever. I said, groove one is where
everything comes from. Everything else comes from that. So I told a story
yesterday of Manny Ramirez, one of the greatest
baseball hitters ever. He hit off a tee, he hit off
a little league tee every day. To reinforce his stroke. Reinforce his swing,
to have center, so he knew where center was. So he always knew where his
absolute, his sweet spot. And he never outgrew it, ever. I had never outgrown. (drum music) There are guys who have
made millions of dollars because they play
that beat better than anyone else in the world. And there is a reason
why, there's a feel, there's a flavor for that.
So I recommend everybody
start with groove one. And that progresses through. And don't try to, like
play it and knock it down. You know, you record yourself. So you play groove one. So groove one slow. (funk music) And that's all it is. And it's like that for
four phrases of 16 bars. And when you put that up,
and I put it on Pro Tools. I put the track on the
bottom of Pro Tools, and I record their
kick and their snare. And then they see,
they see it goes, the lineups are like,
here's the track, and here's their kick,
it's like way early.
And it's supposed to
be right underneath it. And just that alone,
you're getting that, (drum music) you're getting that
weight on the one. It takes a lifetime, a lifetime, to be able to master
that, you know. So I always recommend
starting at groove one. And then as you progress
through the grooves, the first one that starts to get a little bit interesting
is groove 11. And groove 11,
it's a funk groove that has the first
syncopated off beat that's written constructionally from the actual
groove composition. (drum music) Two, three, four. (drum music) One, two, three, four. One, two, three, four. One, two, three, four. One, two, three, four. So just that simple move
of moving the backbeat to the and the four throws
people into a complete tizz. Okay, right, and now,
right now at this moment, but there are people
who are thinking like, well, that's easy,
I don't know why anybody would have
trouble with that.
You are missing the point. You are missing the point. That may not be hard for you, but what's hard for you
may not be hard for them. So have sympathy for the
person who's having trouble with something
that's easy for you. And then hopefully
will have mercy on you when you screw up
in front of them. – Yeah.
– Okay? You have to be generous with
your, with your patience. Yeah, 'cause people have trouble on certain things,
and stuff, you know. So I recommend going
through each one. And then you go through the
funk and R and B grooves, those are always a lot of fun. You get the one-handed
16th notes going, and groove 17 is a
half time shuffle. And then, the wheels
come really off the bus when we get to groove 18,
which is the first jazz groove.
Okay, all right, and
there's five jazz grooves, they're slow and fast. And I'll be talking about those with Dave tomorrow,
and stuff like that. – Right, yeah, so Tommy's
doing a whole course inside of Drumeo for
Drumeo Edge students. So if you're not a member,
maybe now's the time. – Yeah, if you're not a
member, now's the time, because I'm gonna give
some of the inner secrets of Groove Essentials that
I've never told anyone before. The hidden–
– The hidden gems. – The hidden trap doors
that are inside the book. It's the best book ever written, and it's the most evil
book ever written. – Tommy, man, we are
already at an hour. – Get, what?
– I told you, I told you. Just like this. So what I'd like to do, can we, 'cause you have so many tunes
that you've been playing here.
I would love it if
you would just play like two songs in
a row or something. – Two, come on, come on.
– You can do it. – Come on, why don't
we talk some more, and then I'll do one. All right, all right, all
right, all right, all right. And really, there are so many. – [Jared] Well just
keep going, man, just keep playing.
– Stop it. Stop it, you're terrible. I could do two tunes, you know, we've been talking
about Groove Essentials. I could do two tunes
off Groove Essentials. – Yeah, whatever. – Or I could just save
those for tomorrow. I know what I'll do. I'm gonna do the five today. I'll do the five,
and I'll end with one of the monster clinic tunes. So this is it right here,
groove 93, there it is. So this is a great groove, and, I gotta give it up
for the musicians who play on Groove Essentials. Because those, Ted Baker,
VoShawn Johnson on bass, Kevin McKeon on guitar, Allan
Farnham on more keyboards, and Rolando Morales
Matos on percussion. These guys, the way we
wrote Groove Essentials, and again, this is another story I haven't really told anybody, is I wrote all the grooves
that I wanted to talk about.
And I basically wrote the book. And I had everything down,
but I didn't have the tracks. I wrote the grooves
and the variations. And I brought those guys in,
and we sat in a semicircle, and I pre-recorded the grooves. So I'd like play them down,
and I could loop them. And then these guys, we would
just come up with a bassline, and we'd come up with riffs,
you know, and stuff like that.
And before you know
it, like we did, they recorded
everything in a day. That's how fertile
their minds are. And I play piano too,
so I was playing piano along with them, or
I'd sing a bassline, or he would just come
up with something. So this, this is actually,
this bassline is all VoShawn. He just like, he's, he's bad. So he just came up
with this thing, and it's one of my favorite
tracks off of the two records. It's really, really cool. And we're in the process
of actually blowing it out for the Conspiracy, the Groove
Conspiracy is gonna play it. Yeah, it's really cool.
So I'll try to play this,
and if I make it to the end, you can say goodbye. – If you fall over and
just pass out, then. (laughs)
I call the ambulance. (funk music) Nice work, you did it. You're still sitting, awesome. Tommy, thank you so
much for this lesson. It's so great to
finally have you out. And you know, from
my perspective, I've been teaching online
for around 15 years. Teaching five years
before privately. So for me, just from an
educational standpoint, as an educator, getting to see
how you roll is pretty cool. – Thank you Jared, thanks. It's an honor to be here. And without blowing
any smoke at all, you've created something
really special here, and it's really great to see, and it's an honor to be invited. – Thanks man. So, just another
thank you to Yamaha. I see Ryan back there. You know, Cam, Shawn,
Omar, all the people at Yamaha Canada, Yamaha
US and Yamaha everywhere.
You guys are great. Remo, Zildjian, Vic
Firth, thank you so much. Make sure you check out
Tommy online, tommyigoe.com, follow him on Instagram, he
posts a lot on Instagram, which is really, 'cause
you kinda get to see behind the scenes,
and what's going on. – From the band, yeah, a
lot of stuff from the band. You know, live views
of what's happening, you know, behind the scenes when we do gigs,
and stuff like that.
– Yeah, so give him a
follow and check him out. And like I said, if you
want to check out Drumeo, we would absolutely
love to have you. There's a free seven day
trial, go to drumeo.com/trial. We're filming a bunch more
stuff with Tommy tomorrow, which you can check out. Especially if you have
Groove Essentials already, you know, it's something
you added to that book, you'd probably
want to go through. And it's free, it's a
free seven day trial. – Hey, it's free,
you can't beat free. – Well, it's for seven days. Then it's gonna cost you
a little bit of cheddar. Hey, thanks man. – Thanks for having me out, man. – I'm gonna step out
and, so just wait, just wait on playing that
song until I get out there.
The second 12/8 I think is a lot harder. It’s the same idea, but instead of being
tone tone slap, it’s tone slap slap. So instead of being 2 tones, 1 slap, now it’s
2 slaps 1 tone… I don’t know why that’s harder. Maybe it’s not harder for you, but I think
it might be… So, I’m doing, starting with my right hand
tone, tone slap slap tone slap slap. And this is a really common lick used in a
lot of Guinean solos and stuff… So, again, same as the previous one… practise getting it slow… and make sure
your hits are clean… and then, speed it up gradually… making sure your hits are
still clean… And making sure your tones especially are
kicking out.
You’re not just sort of going… You want the tones to really hit you in the
chest… And almost exaggerate the tones if you can. So that’s the next lick I want to show you. So another way, if you’re practising with
that previous video, doing the.. where I’m just playing the bell… that’s how you
can make it into a lick. But same as the previous one, start doing
two: tone slap slap tone slap slap. And then do four… And then, do a bunch… So, ideally, you’re still keeping the pulse
or the bell in your head so you know, you’re not just doing a random number, you’re feeling
the cycle.
So you’re going 1, 2, 3, 4, 1, 2, 3… For example… So you’re still hearing that cycle, so if
you’re soloing on top of a rhythm, or with a band or something, you’re not going out
of time, you’re not losing track of where you are, and you’re kind of always keeping
track of where you are… So that’s the next little lick I want you
try – 12/8 lick, really common lick. – Learn how to play djembe and other African
drumming with African Drumming Online.
Hello once again and welcome to another
cajon lesson. Now today, I wanted to talk about something a little bit different. A few people have been asking about finger technique again and how to build up all the strength and speed that's sometimes required to play some of the grooves that I've been working with here. So today, this is more of an exercise type of lesson and just something that I recommend spending a lot of time on and it's really helped me to build it up to a point where comes quite easy at speeds and getting that volume out of each finger stroke. So let's talk about that today, let's get into it! Now, this exercise and the variations that we're going to go through really rely on being rock solid at a tempo that you can do comfortably rather than a little unsteady at a tempo that is just a little bit out of reach. So the first thing that I recommend doing is. (If you have a smartphone) grab a metronome app, If you've got a physical metronome, get that going.
And pick something where you think you can do 16th notes just as normal strokes And then, on top of that, can you do 32nd notes (twice as fast) as finger rolls. So, whether that's 60 beats per minute or 120 let's find somewhere where we can get started. So, I've got my metronome set to 60 beats per minute. A nice, slow, fairly comfortable tempo. The exercise is just half a bar, so, 2 beats of the 16th notes, just full strokes. And then, the second half of the bar (beats 3 and 4) are the 32nd note finger roll. So let's just play through that now and then I'll talk a little bit about it. So, 60 beats per minute is actually a tempo that I personally need to work on with that finger roll, just making those double stroke rolls between the fingers actually sound even.
I still get a little bit wobbly when I slow down that much. It's kind of like when you ride a bike. It's hard to ride really slowly (you get a little bit wobbly) That's where I'm coming from at the moment, that's why I'm sharing this today. One of this things that I'm trying to improve on myself is making it so that whether I'm playing full hand strokes or the finger roll strokes I'm getting a fairly level volume between them so that if I do play some kind of groove and I rely on that finger roll to come through then I've spent the time practicing to make that strength come up in the fingers. So that's just one variation doing the half and half bars What we can work on now is a full bar and then a full bar of finger stroke and all kinds of variations including triplets and things on top of that.
So let's have a listen to some of those now. So here's 90 beats per minute. It's a nice medium tempo. But this time we'll do a whole bar of the 16th strokes and then a whole bar of the 32nd note finger strokes. So this is 120 beats per minute. Now I'll try a few of those variations and go between them spontaneously. So we've got 1 beat, 2 beat, 3 beats, whole bars. Let's see what happens. So I struggled a little bit with that. But it's one of things that I do like to practice. Because you can keep pumping that metronome further and it just keeps getting more and more difficult But breaking it up into different groups of 2s and 4s and whole bars It makes it quite interesting to spend quite a bit of time on it.
So the reason that we've been going for the 16th note, 32nd note combination there is because the transitions from those 16ths to those 32nds as finger rolls is quite intuitive in that you keep the same motion between hands it's just that each stroke becomes a double stroke because of the fingers. Which means that when you do start to speed it up, keeping the tempo and all those types of factors becomes a little bit easier. But if you really want to focus just on those finger strokes, something else that you can do is try the same 16th note and 32nd note combination but make it all finger rolls. So that's something else that you can work on if you really want to focus on that area in particular. And that's one for me that's really good with the metronome for getting those finger stroke rolls in time and nice and even. breaking it down that way and playing them at the two different speeds has really helped me with that too. So there's one way to work on those finger rolls and build up strength and speed.
Another thing to think about is our left hand. Or if you're left handed, your right hand. Either way, most of us have one hand that's a little bit weaker than the other. And one tends to dominate, and for me that's the right hand. So another thing that I like to do when I'm working on when building up strength and speed is playing patterns leading with the right. And then playing patterns leading with the left. So then whether that just be a group of 2 beats or whatever. Or actually like a 5 stroke roll We can work on that in the same kind of exercise. So let's start with some little 5 stroke rolls. Right, right, left, left, right and left, left, right, right, left. That little 5 stroke roll is just an easy way to get into letting your non-dominant hand lead the pattern every now and then. Now what that does is it definitely brings it up closer to the level of your dominant hand.
In speed and in strength. And we can definitely extend that into longer groups. So that might be a whole bar leading with the right and then a whole bar leading with the left. Let's just see how that sounds. And I do have one more idea for this video. For building up strength and speed and endurance with finger rolls. And that is to place them into grooves in a way that the groove would fall apart if they weren't there. When you place that kind of importance on the finger rolls you really hear where they're not loud enough or consistent enough. So that's something that's forced me into practicing them a lot more. Let's have a listen to few examples.
And that is my three favorite
exercises for building up strength, speed, endurance all that good stuff for the finger roll technique. Hopefully you enjoyed this video! If you've got any other suggestions definitely leave me a comment in that comment section down below. I'll be around to those comments replying as much as I can. So, if you want to keep up with my new videos as they come out be sure to subscribe to the channel! And yeah, of course thanks very much for watching. I'll see you on the next video! .
Next sound we’re going to look at is a tone. So, basic idea – it’s on the edge of the
drum, and you’re using the full length of your fingers. So, as a rough guide, you’re aiming for
this paddy bit here, between your palm and your first knuckle. So, if you’ve got some padding there, that’s
sort of where should be on the edge of the drum. And the idea is, hand starting back here,
bring your wrist back, not just lifting your arms up like this, so making sure you’re
getting your wrist involved, right at the start – will keep you in good practise for
later – lifting your hand back, hand comes down, hits with full face of the fingers from
where the impact is, you can see from the overhead shot, roughly there on the edge of
the drum, and hits with the full face of the fingers and your hand comes off the drum,
letting the sound ring out, like this… So that’s a tone… So, when you’re singing the rhythms, tones
generally will be something like ‘ding’ or ‘ting’, so remember for the bass you
had ‘goong’, tone would be ‘ding’.
It changes a bit, but you’ll get the idea. So, if I’m going ding ding… Like that, two tones. So, remember, if you’re practising it, and
you’re being really careful of your technique – 3 main points to think about. One is making sure your hand comes back here,
so when you’re practising slowly, notice my wrist is bent back, so my wrist isn’t
locked, wrist is moving the whole time, so wrist is back, arms aren’t, you can lift
your arms up high if you want, but you don’t have to for now – the higher you lift your
arms the more power you get. So, wrist back, as you come down making sure
you’re hitting with the full surface of your fingers, not having too far forward – if
it’s too far forward you’ll get this sort of sound… so if you’re hearing sort of
a muted, paddy sound, probably means your fingers are a little bit too far forward,
you’re probably hitting with this part of your fingers.
The other way you don’t want to do is if
you wrist is too far back, and your fingers are too tight… You can still get a good sound, but you’re
really only hitting with this bit of your hand, and it won’t be as full a sound. So the difference is this… Versus this… So, hopefully you can hear that. If you can’t, just take my word for it. So, you want to make sure all of your fingers,
from the edge of the drum to where they finish is all touching the drum at once. So, first thing: wrist back, second thing:
touching all the drum at once with your fingers, and third thing: making sure your hand comes
back here to where it started so the sound can ring out… like that..
So you’re not playing like this… you’re
making sure after you play your hand comes back here… like that… And that’s tones. – Learn how to play djembe and other African
drumming with African Drumming Online.
hi everyone welcome to my channel crochet
for baby thank you for watching and thank you for subscribing in today's tutorial i'm
going to show you how to crochet this vest for boys between 1 and 2 years old now you can
also make it smaller or bigger from six months up to five years old down here in the information
box i'm going to leave you some information on how you can make it smaller or bigger so be sure to
check that out also remember that my channel is bilingual always always all of my tutorials are
always in english and in spanish just click the little lamp down here next to my channel name
and it'll take you to my main channel page okay so i hope you like it and without further say
let's get started and thank you for watching okay to begin i'll be using this 3.5 millimeter
crochet hook and today i'm using this dk weight yarn this is the brand of yarn that i'm using
it's called style craft special double knit this is in the color aster now if you're in the us you
can use any number three yarn now to begin i have 88 chains this chain here is measuring about 18
inches which is about 46 centimeters now if you're off by maybe half an inch or a couple centimeters
it's okay just continue with the 88 chains now to begin what we're going to do is we're going to
join to the first chain so we're going to do this so that our chain is not twisted now insert
your hook into the first chain this one here and then join with a slip stitch now chain one and actually chain two
these two chains never count as a stitch now yarn over and insert your hook again
into the last chain and through the first chain here and make a double crochet now work one double crochet for
each one of the remaining chains so into this next chain make a double crochet
double crochet into the next and so on this is all i'm going to do for this first row
and at the end of this row i'm going to have 88 double crochets continue and i'll meet you here
at the end okay i'm here at the end of this first row this is where we did double crochets and i
have a total of 88 double crochets now to finish go on top of the first double crochet and join
with a slip stitch now for the second row chain two the two chains never count as a stitch now in
this row we're going to alternate between a front post and a back post double crochet so beginning
into this first double crochet make a front post double crochet back post double crochet into
the next front post double crochet into the next and back post double crochet into the next
this is all i'm going to do for this second row a front post double crochet and a back
post double crochet continue like this for this second row and i'll meet you at the end i'm
here at the end of this second row now to finish this row we're just going to go on top of the
first double crochet and join with a slip stitch now for the third and fourth row you're going
to do the same thing you're going to chain two and then work a front post double
crochet and then a back post double crochet front post double crochet and back post double
crochet and so on we're going to do this for this third row and then for the fourth row the same
thing so continue and i'll meet you at the end of the fourth row okay i'm here at the end of
this fourth row now to finish go on top of the first double crochet and join with a slip stitch
and this is how i finish this fourth row now for the first row we're going to start counting
rows so we're going to start using our pattern chain three and into the same stitch where we
did the slip stitch make two double crochets now skip one two and into the
third make three double crochets again skip one two and into the third again
three double crochets skip one two and into the third three double crochets this is how i'm
going to continue for this first row so continue like this and i'll meet you at the end of this row
okay i'm here at the end of this first row now up to here i have 29 fans and i have three stitches
here what i'm going to do here i need to make one more fan so i'm going to skip one and and into
the next i'm going to make three double crochets now to finish pinch the third chain here to the
side and join with a slip stitch and this is how i finish this first row with a total of 30 fans
now from here on we're going to have to turn for every row this stitch you can easily make where
you work it in the round but i'm not going to do that because once we come to the separation
of the front and the back panel we're going to have to work this stitch in rows so it's going to
have a different texture once we do that so i'm going to turn for every row starting here so to do
this we're going to turn now we're going to chain three and we're going to go down to the row below
and into this stitch that we left in between the two fans i'm going to make a double crochet
then right next to it to the side i'm going to make another double crochet again jump to the
next space between the fans so right here make a double crochet to the row below and make a double
crochet into that stitch that we left and then to the side a double crochet now these next
ones we have two stitches these two were the last two that we did we only had one stitch in
between but here we have two stitches so you're going to have to be consistent you're either
going to the first or into the second what i'm going to do is i'm going to go into the first
so make your first double crochet then go to the row below and into that first double crochet make
another double crochet and then right to the side another double crochet so double crochet
go down to the row below and into the first double crochet make a double crochet and
right next to it here make a double crochet and that's all we're going to
do go down to the row below make a double crochet and a double crochet here
to the side okay so continue like this for this second row and i'll meet you here at the end
okay i'm here at the end of this second row now to finish this row we're always going to pinch
here the third chain and join with a slip stitch and this is how we finish this row now for the
third row and all the rows to follow this is what we're going to do you're going to chain three and
turn and you're going to go down to the row below well in this case we have the chains
and then the two double crochets right in the middle we have this double crochet
so insert your hook right there and make a double crochet and right to the side here make another
double crochet again go into the next space make a double crochet go down to the row below and
in the middle insert your hook and make a double crochet and right here to the side make another
double crochet and that's all we're going to do the important thing here is that you need to turn
for every row and then everything else is the same okay so continue for this third row i'll meet
you once again here at the end to show you how to finish each row and then how to start each
row so that you can work the rest on your own okay i'm here at the end of this third row
not to finish this row and all the rows to follow remember we always pinch
the third chain here at the top and we join with a slip stitch now for the fourth
row and all the rows to follow you're always going to chain three and turn and then here we're going
to go below into the middle double crochet here because we already have a double crochet here the
three chains counts as your first double crochet so go down into the middle double crochet make a
double crochet and then here to the side make your third double crochet again jump to the next space
make a double crochet go down to the row below and then the middle double crochet make a double
crochet and right to the side a double crochet and this is all we're going to do from here on i'm
not exactly sure how many rows i'm going to do but just continue watching and i'll let you
know exactly how many rows i'm going to do remember to finish you always join to the top here
to the third chain with a slip stitch chain three turn don't forget to turn for every row okay
so continue watching and i'll meet you at the end of that row okay did a total of 22 rows
and it's measuring from the top of this last row to the bottom here it's measuring about 21
centimeters which is about 8.25 inches now what we're going to do is we're going to separate
the back and the front so here i have placed my stitch markers so for the back we're going
to have 13 1 2 3 4 5 6 7 8 9 10 11 12 13 fans and then for the front same thing 13 1 2 3 4 5
6 7 8 9 10 11 12 13 and right here on the side i have two fins and two fans here on the side
so that's a total of 30 fans all around that's how we're going to divide this section so here
we're going to go to this side the front side and we're going to work this row from the inside
out because my last row here was worked on the right side so my next row is going to be worked
from the inside out and we're going to go here to this place where i have this stitch marker if
i count the fans from where i finished i have one two three four five six seven eight nine and
right into this space insert your hook chain three one two three and then go down to the row below
and make your long double crochet the three chains counts as the first double crochet and
then right next to it make your double crochet and then into the next space and do the same
thing you're going to work another stitch and then continue for a total of 14 stitches 1 2 3 4 5 6 7 8 9 10 11 12 13 14.
I'll meet you
right about here to show you what we need to do next okay did 14 stitches so we have 1 2 3 4 5 6
7 8 9 10 11 12 13 14 14 stitches for this first row now we're going to chain three and turn and
inside the next space here we're going to work our first pattern stitch so double crochet go to
the row below and make your long double crochet and then right next to this one a double crochet
and i'm going to do the same thing for each one of the spaces until i come here to the end of
the second row i'll meet you here to show you what we need to do next i'm here at the end
i have 13 stitches 1 2 3 4 5 6 7 8 9 10 11 12 13 stitches for this second row to finish
pinch here the last chain right there to the side and make a double crochet now for the third row
chain three and turn now here we're going to go into the first space which is this one here the
three chains counts as the first double crochet so go into this space here but go to the row below
and into the second double crochet make your long double crochet and then right next to it your
double crochet jump to the next space and repeat you're going to continue and repeat our pattern
stitch until you come to the end of this third row for this row we're going to have 14 one two
three four five six seven eight nine ten eleven twelve thirteen fourteen i'll meet you at the
end of this third row i'm here at the end of the third row i have fourteen pattern stitch now
for the fourth row we're going to chain three and turn now for this row we're going to go into
this first space here and make our pattern stitch and then into each one of the spaces
repeat the same thing until you come to this last space i'll meet you here at the end
of this fourth row i'm here at the end of this fourth row i have 13 stitches 1 2 3 4 5 6 7 8 9 10
11 12 13 to finish we're going to pinch here the last chain and make a double crochet at the end
now for the fifth row we're going to chain three one two three turn and we're going to jump
to the second space we're going to skip this first one and jump to the second space and
we're going to work our pattern stitch here and then jump to the next space and repeat you're
going to do this until you come to the end of this row so i'll meet you right here to show you how
we're going to finish this fifth row i'm here at the end of this fifth row i have 12 stitches 1
2 3 4 5 6 7 8 9 10 11 12.
To finish we're going to pinch here the last chain and make a double
crochet now for the sixth row we're going to chain three and turn and here we're going to work
our first pattern stitch right here so i have my three chains which counts as one double crochet
so now we're going to go to the row below and make our long double crochet and then into the
right next to it a double crochet and then into each one of the spaces repeat the same thing until
you come to the end of this sixth row so continue and i'll meet you here to show you what we need to
do next i'm here at the end of the sixth row and i have 13 pattern stitches now for the seventh row
chain three and turn here we're going to work our first pattern stitch into the first space so make
a double crochet go to the row below and make your long double crochet and then right to the side
a double crochet and then do the same thing into each one of the spaces i'll meet you at the end of
the seventh row okay i'm here at the end of this seventh row here at the end i finished by making
a double crochet now you should have a total of let's see 12 stitches 1 2 3 4 5 6 7 8 9 10 11 12.
now for the next row we're going to start counting rows here so chain 3 and turn we're going to begin
counting rows because we're going to separate here in the center we're going to make the v part
of the vest so here into this first space here go down to the row below and make your first
double crochet which is a long double crochet right next to it another double crochet and then
into each one of these spaces i'm going to do the same thing until i come to the stitch marker here
i marked six stitches let's see one two three four five six yes and then a stitch marker and
then six for this side so that's the center so i'm just going to work these stitches
until i come to the stitch marker like this so that's three four five six and then into this next space where i have
a stitch marker just make a double crochet that's what it looks like so you
should have six one two three four five six and then a double crochet now
for the second row chain three and turn and into this first space here we're going to
make our first stitch so i have my three chains which counts as the first double crochet go down
to the row below and make your long double crochet and right next to it a double crochet and
then into each one of the spaces continue and work our pattern stitch i'll meet you at the
end of this second row i'm here at the end of the second row i have six stitches one two three four
five six and i finish by making a double crochet here at the end now for row three chain three and
turn the three chains counts as your first double crochet so into this space here we're going
to go to the row below and make a long double crochet and right next to it a double crochet so
here's our first pattern stitch and i'm going to continue along until i come to this last space
just working our pattern stitch so that's two three four five and six now make a double crochet here
on top of the last double crochet chain three turn now in this
fourth row we're going to skip this space here and jump to the next space and
work our pattern stitch we're going to reduce here and then i'm going to continue and work the
same stitch into each one of the spaces and let me check the end of this fourth row i'm here at the
end of the fourth row i have five pattern stitches one two three four five and then here at the end
i finish by making a double crochet now for rows five chain three and turn now into this first
space we're going to go down to the row below and make our long double crochet and then a double
crochet right next to it so here's our stitch now into each one of the spaces i'm going to work our
pattern stitch that's two into the next same thing that's three that's four and five now here we're going to reduce again
now here we're going to pinch here the second chain and make a double crochet and that's how i
finish the fourth row we have one two three four five pattern stitches now for row five chain three
turn and into this first space here we're going to go to the row below and work a long double crochet
and then a double crochet and into the next space work our pattern stitch and
continue for the rest of this fifth row i'll meet you here at the end to show
you what we need to do next i'm here at the end of this sixth row to finish just pinch the last
chain here and make a double crochet now we have one two three four five pattern stitches now
for the seventh row chain three and turn into this first space go down to the row below make a
long double crochet next to it a double crochet and continue work one stitch or your pattern
stitch inside each one of the spaces so that's two three that's four and five now to finish we're going to
pinch your last chain and make a double crochet that's what it looks like now for row
eight we're going to chain three and turn now we're going to skip this first space and into
the next we're going to work our first pattern stitch so in this row we're going to reduce again
so continue now and work a stitch inside each one of the spaces and i'll meet you at the end of this
eighth row okay i'm here at the end of this eighth row i have four fans and here at the end i did a
double crochet now for the ninth row chain three and turn into this row below go down and work
your long double crochet right next to it a double crochet and into the next space work a stitch
or the pattern stitch that's two into the next that's three and into the next another one so
to finish this ninth row just pinch here the second or the last chain doesn't matter and
work a double crochet now for the tenth row chain three and turn and here we're going
to work a stitch inside each one of the spaces so beginning here go down to the row
below and work your first pattern stitch or a long double crochet and then a double
crochet and into each one of the spaces work a stitch until we finish this tenth row
so continue and i'll meet you here at the end okay i'm here at the end of this 10th
row here to finish we're going to pinch here the last chain and make a double
crochet and this is how i finish the tenth row and i have four fans now we're going to
make three more rows so chain three and turn now into this first space go down to the
ruby low and make your long double crochet and then next to it a double crochet into each
one of the spaces work your pattern stitch and that's one two three four
we're going to go on top of this last stitch and make a double crochet so this
is row 11 now for row 12 chain three and turn we're going to skip this space we're
going to jump into the next one and make our first pattern stitch okay to finish pinch the chain here
at the end and make a double crochet and this is the twelfth row one two three fans now
for the last row row thirteen chain three and turn and we're going to go down to the row below
and make our first double crochet with just a long one and then a double crochet next
to it and then to each one of these spaces our patterns did we should finish this
row now with only three pattern stitches which i think is fine for the shoulder to finish
just go here to this to the top of the chain and make a double crochet and i think i'm going
to leave it like this so just cut my yarn pass my yarn through this last loop and here is the
13th row so now let me show you the other side now we're going to go here to this other side and
we're going to do the same thing so i'm going to show you this next so our first row here that
we started we started on the right side so i'm going to have to go into this space which is the
center again grab this loop bring it through the front and chain three one two three now jump to
the next space and work your first pattern stitch and i'm going to do this for
each one of the spaces that's one two three four five and six and right here where that we have the chain just
insert your hook there and make your last double crochet and that's the first row we have one two
three four five six pattern stitches now for the second row chain three and turn here we're going
to work the stitch inside each one of the spaces in the same way like we do beginning into this
first space same thing so continue for this second row and i'll meet you here at the end right about
here to show you what we need to do next i'm here at the end of this second row i have six pattern
stitches my last stitch i did it here into the chain three space right there now for
the third row chain three and turn now in this row into each one of the spaces
we're going to work our pattern stitch like this until we come to the last space that's two three four five and six into this last chain three space okay and here's the third row you should
have six fans one two three four five six now for the fourth row chain three and turn now into this first space
work your first pattern stitch and you're going to do the same into each one
until you come here to the end of this fourth row i'll meet you here at the end to show you what
we need to do next i'm here at the end of this fourth row i have so far one two three four five
pattern stitches to finish just pinch the chain here at the end and work a double crochet
now for the fifth row chain three and turn here we're going to jump to the first
space and work our pattern stitch and into each one of the spaces do the same thing that's two three four and five now for row six chain three and turn jump to
the next space and work your pattern stitch and into each one of the spaces do the same thing
until you come to the end of this sixth row i'll meet you here at the end to show you what we need
to do next i'm here at the end of the sixth row i'm going to work my last pattern stitch here
at the end where we have these three chains so double crochet go down to the row below and make
your long double crochet and then a double crochet that's how we finish the sixth row with five
fins now for the seventh row chain three and turn now here jump to the first space
and work your first pattern stitch and i'm going to do the same
thing into each one of the spaces so that's four one two three four and into this
last space we're going to make our last one and there it is we have five pattern stitches
one two three four five now for the eighth row chain three and turn i'm going to work our
first pattern stitch into the first space and then into each one of the spaces until i
come here to the end i'll meet you at the end of this eighth row i'm here at the end of this
eighth row i have four pattern stitches now to finish we're going to skip this last space
and we're just going to pinch this chain here at the end and make a double crochet and
that's what it looks like now for the ninth row chain three and turn jump to the first space
and make your first pattern stitch like this so i'm just going to work one of these
pattern stitches inside each one of the spaces and i'm going to have four at the end of this
ninth row so here to make the last one insert your hook into this chain three space go down to
the row below make your long double crochet in one and right to the side a double crochet
and then here is the ninth row for row ten chain three and turn and you're going to work a
pattern stitch inside each one of these spaces until we finish this row and you're going to
end again with four of these pattern stitches i'll meet you at the end of this 10th row
okay i'm here at the end of the tenth row i have four pattern stitches now for
the eleventh row chain three and turn now we're going to jump to the first
space here and make our pattern stitch and do the same into each one of the spaces and then to this last space same thing go down
to the row below and make your double crochet and then right next to it double crochet
so here's the eleventh row with four pattern stitches now for the twelfth row
chain three and turn now here jump to the first space and work your first pattern
stitch all the way to the end of this row now here at the end we're
going to skip this last space so just pinch the chain here at the end
and make a double crochet and here's the 12th row we have three pattern stitches now
for the last row row 13 chain three and turn we're going to skip this space jump to the
next one and work your first pattern stitch that's two and one more okay that's the 13th row i think it's perfect
looks exactly like the other side so now cut your yarn and pass your yarn through this
last loop leave a small tail we're going to use this to seam this part here so now both
sides are done and that's what it looks like so now i'm going to show you the back
side so we're going to do the back part now this is where we finished when we did the
first row so we started here from the inside out this is the first row for the front panel we
started here and then we worked our way this way so now we're going to come here into this space
so this is the last stitch so if you count one two and into this space right there we're going to go
in and grab a loop chain three one two three and then go down to the row below and make a double
crochet and right next to it a double crochet and that's all you're going to do for each one of
the spaces you're going to work our pattern stitch and then continue all the way to this other stitch
marker we're going to make a total of 14 pattern stitches so i'll meet you right about here at the
end of this first row to show you what we need to do next i'm here at the end of the first row for
the back side i have 14 of these stitches now for the second row chain three and turn we're going to
work our pattern stitch inside each one of these spaces so beginning into this first one you're
just going to work your first pattern stitch and then continue and do the same thing for each one
of the spaces so continue for the second row and i'll meet you at the end i'm here at the end of
this second row i have 13 pattern stitches now to finish we're just going to go here on top of the
third double crochet and make a double crochet now for this third row chain three and turn beginning
into this first space here we're going to make our first pattern stitch the three chains counts
as your first double crochet so go down below and make your long double crochet and right next
to it another double crochet and then into each one of the spaces you're going to work our pattern
stitch so continue like this for this third row and i'll meet you here at the end i'm here at
the end of this third row i did my last stitch here into the chain three space right there and
i have 14 pattern stitches now for the fourth row chain three and turn now into each one of these
spaces we're going to work our pattern stitch in the same way that we always do so continue
for this fourth row make one pattern stitch inside each one of these spaces and i'll meet you
here at the end okay i'm here at the end of this fourth row to finish we're just going to pinch
the last chain here and make a double crochet i have a total of 13 pattern stitches now for
the fifth row chain three and turn here in this row we're going to reduce so we're going to
skip this space and into the second space here we're going to work our first pattern stitch
this is the same thing we did for the front side so now all you're going to do is just work
your stitch inside each one of these spaces all the way to the end of this fifth row so
continue and i'll meet you here at the end okay i'm here at the end of this fifth row now
to finish here what we're going to do is we're going to skip this last space and we're going to
pinch here this chain and make a double crochet now in this row you should have 12 stitches and
from here on we're just going to continue with the same thing we did here in the two rows below we're
going to work rows and you're going to alternate between having 12 stitches or like in the next
where you're going to have 13 so 12 13 12 13 until we reach the same height as this part
here uh i think if i count it correctly it's about 17 rows if not just continue watching
and i'll let you know exactly how many rows you're going to do so to start you off here for
the sixth row you're going to chain three and turn into this first space we're going to work our
first pattern stitch but remember the three chains counts as the first double crochet so go
down to the row below and make your second double crochet which is your long double crochet and
then a double crochet right next to it and then inside each one of the spaces you're going to work
our pattern stitch now you're going to do this all the way to the end of this sixth row here at
the end you're going to make your last pattern stitch here and you're going to have 13 for
this row then you're going to chain three turn and then repeat at the end of that row you're
going to have 12 and then so on so here we're not going to make any more reductions as you
can see this is what it looks like we just work the reductions that we did here and then from
here on it's just a matter of just working rows like i said until we reach the same height as
the this part here of the shoulder so continue and i'll meet you once this part here is done
okay i'm here at the end of the 19th row now i still need to do one more row so what i'm going to
do here is i'm going to leave this part here open without doing anything so what i'm going to do
here is just work one two three of these pattern stitches and then a double crochet so to do this
we're going to chain three one two three turn and then to this first space go down below and
make your long double crochet in a double crochet here's our first pattern stitch and into the
next two spaces you're going to do the same thing now here into this last space make a double
crochet cut your yarn and pass your yarn through this last loop i think i cut mine too
short but anyways it was fine so here one two three and then the double crochet
which matches to the front panel here one two three now we're going to do
the same thing for the other side so we're going to turn this actually no we're
not going to turn this we're going to actually skip one two three four five six and into this
space here we're going to grab a loop chain three one two three jump to the next
space and work your pattern stitch into the next one same thing and into this last space your last pattern stitch and there we have it three which should match up
to this here perfect now cut your yarn and leave a long tail because we're going to use this to
seam both sides here so this part here is done now we're going to seam this
so turn this to the wrong side and we're going to go here here i mentioned
to leave a long tail so we already have this here so just pass this through your needle and we're going to go here now all
of these stitches should match up like this exactly so we're going to go
into each one to close it see like this perfect so go here on top of the first double
crochet or the three chains insert your needle like this and then back again to
reinforce this first stitch perfect and then go from actually my yarn is on this side so
go from this side into the second stitch and then into the third stitch and
then to the third one on this side and then we have the first double
crochet of the next pattern stitch find the next one here which is the first one
and we're going to go into the next and so on we're going to do this until this part here is
closed so make sure you match up these stitches on both sides and then one more the three
chains and then the double crochet and then just reinforce this
one here by going over it again perfect so now this side here is done that's what
it looks like from the inside or the right side now you're going to do the exact same thing here
for this side we have this yarn here that we left and you that's what you're going to use to close
it do it in the exact same way so so go ahead and do this side and i'll come back and show you what
we need to do next okay i finished joining both sides and this is what it looks like so now we're
going to work single crochets right here in the center so here insert your hook right here where
we have this center uh fan stitch or this center you know the three double crochet so right in
the middle insert your hook there grab a loop like this bring it through the front and chain one
if we don't do this then there's going to be a gap and i want to try to close all these gaps with
these single crochets that we're going to do so there's my first chain now go here to
the side there is no right or wrong way of doing this you're just going to have to
eyeball it and make single crochet so that you are making a nice edge here the important
thing is that it looks nice and that these gaps that we have here uh no longer remain so with
that said i'm just going to try my best to show you what i'm going to do on this side i'm just
going to work single crochets right there there's no gap here so just work a normal single crochet
along the side right there now here's a gap so i'm going to go right here see right there make a
single crochet and then there's still a gap there and it looks like there's a gap there
and it probably is stretched because i try to do this before and i think this part
here is getting a little stretched though there i think that looks better now go here
to the side right there make another one another single crochet so far so good then into
this other space single crochet into the next single crochet right here to the side single
crochet so this is what i'm going to do all around now here in the back i'm
just going to work single crochet so it's just going to be here on the sides where
you can really see these um these holes so right along the edge where there is no gap just
make a single crochet there's one here so you're going to have to go into the stitches
before like right here where we did either three chains or double crochets and the point
here is to make sure that it looks nice and even like i said there's no right or wrong
way of doing this you just do it where you think it'll look good and to me i think this is
looking pretty good let's see yes a lot better so this is all i'm going to do for this part here
then i'm going to work single crochets along this part here and then work my way down in the same
way so continue and i'll meet you here at the end okay i finished making this other side here along
the back all i did was just make single crochets and i think it looks a lot better than how it
was originally um the way that i had recorded this part here i didn't like because there were
gaps here but i think i like the way that this looks now so you're going to continue with the
single crochets around the sleeve i already did mine this is just another recording that i did
of this part here since i didn't like the first time that i showed you so continue watching finish
the rest of the vest and then i'll come back and show you the finished vest now we're going
to go here to this side and we're going to do the same thing so i'm going to start here in
this corner right here right there which is the double crochet here of this pattern stitch so just
insert your hook there into that corner chain one now into this same space here make a single
crochet now jump to the next stitch which is the next double crochet and work a single
crochet so here we're just going to do these six because we have three and three and
now just jump here to this side this is a double crochet so do two single crochets
and then this one here is a chain so do one and then two and then one
two one two one and so on two one two one two one two one two one two one two one two and then one for this last
row now jump to this other side and it's probably going to be two now one two then one and then two and so on you get the
point there's no right or wrong way of doing this just so that it looks the important thing is
that it looks nice so continue all around this is what it looks like and once you're you're done
here you're just going to join to the top of the first single crochet with a slip stitch cut your
yarn and paste your yarn through that last loop and then you're going to do this other side
here you're going to do it in the exact same way okay so continue and do both sides
and then i'll come back and show you our finished vest okay i finished making this
other side and this is what it looks like so now my vest is done and this is what it looks like
i love the way that this stitch looks it's so beautiful and it's got so much texture now let me
give you the finished measurements from the top of the shoulder down to the end here it's measuring
about 37.5 centimeters which is about 14.5 inches around this part here the chest it's measuring
about 56 centimeters which is about 22 inches and the sleeve opening it's measuring about
16.5 centimeters which is about 6.5 inches so based on these measurements this little
vest here is for little boys between 1 and 2 years old or 12 to 24 months now you can
also make it smaller or bigger down here in the information box i'm going to leave you
some information on how you can make it smaller from six months or bigger up to five
years old so be sure to check that out okay so this was today's tutorial i hope you like
it thank you so much for watching until next time


 The arrangements "Arrangement" is a word that has plenty of different meanings But in music, it's the step where you choose the instruments That you will be hearing in the song And how these instruments will coexist So that it serves the emotion of
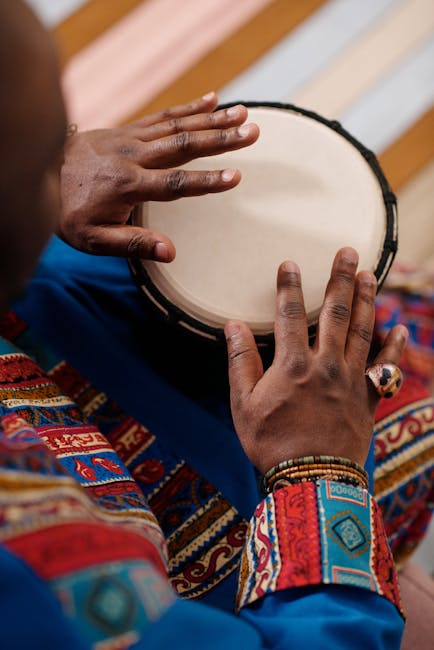
 Ï ù ß .